STM32 CLion & STM32CubeMX Developer Environment Setup
The following documentation details how to set up JetBrains CLion for embedded STM32 development utilizing STM32CubeMX, GNU ARM Toolchain and OpenOCD.
Currently, the debugger on macOS when using this setup does not work. Build and Run have had no documented issues.
Table of Contents
- 1 Initial Software Installs / Setup
- 2 Complete IDE Setup
1 Initial Software Installs / Setup
1.1 STM32CubeMX*
- Graphical STM32 microcontroller configuration manager and code generator.
Prerequisites for macOS:
Installation for macOS:
-
Run
SetupSTM32CubeMX-6.9.1.appfor the application wizard. -
If stopped by macOS, open the
Privacy & Securityin System Settings to allow runningSetupSTM32CubeMX-6.9.1.app.- If wizard never opens or errors, try (replace
6.9.1with your version):
sudo xattr -cr ~/SetupSTM32CubeMX-6.9.1.app - If wizard never opens or errors, try (replace
1.2 CLion*
- JetBrains's C and C++ IDE.
- Students can register for the Free Educational Licenses.
1.3 GNU Compiler Collection (GCC) ARM Toolchain*
GNU Compiler Collection (GCC) ARM Toolchain.
- Toolchain for development on Arm based systems, built off of GNU Compiler Collection (GCC) by ARM Developer.
- Also, available via Homebrew
on ARM Developer Version.
- Full original GNU version can be found on Original GCC.
1.4 OpenOCD*
- For
Windows: GNU Toolchains OpenOCD
- Put the main directory for OpenOCD in your PC user's
Documentsdirectory!
- Put the main directory for OpenOCD in your PC user's
- For macOS: Homebrew OpenOCD.
2 Complete IDE Setup
For reference, official JetBrains documentation: STM32CubeMX projects.
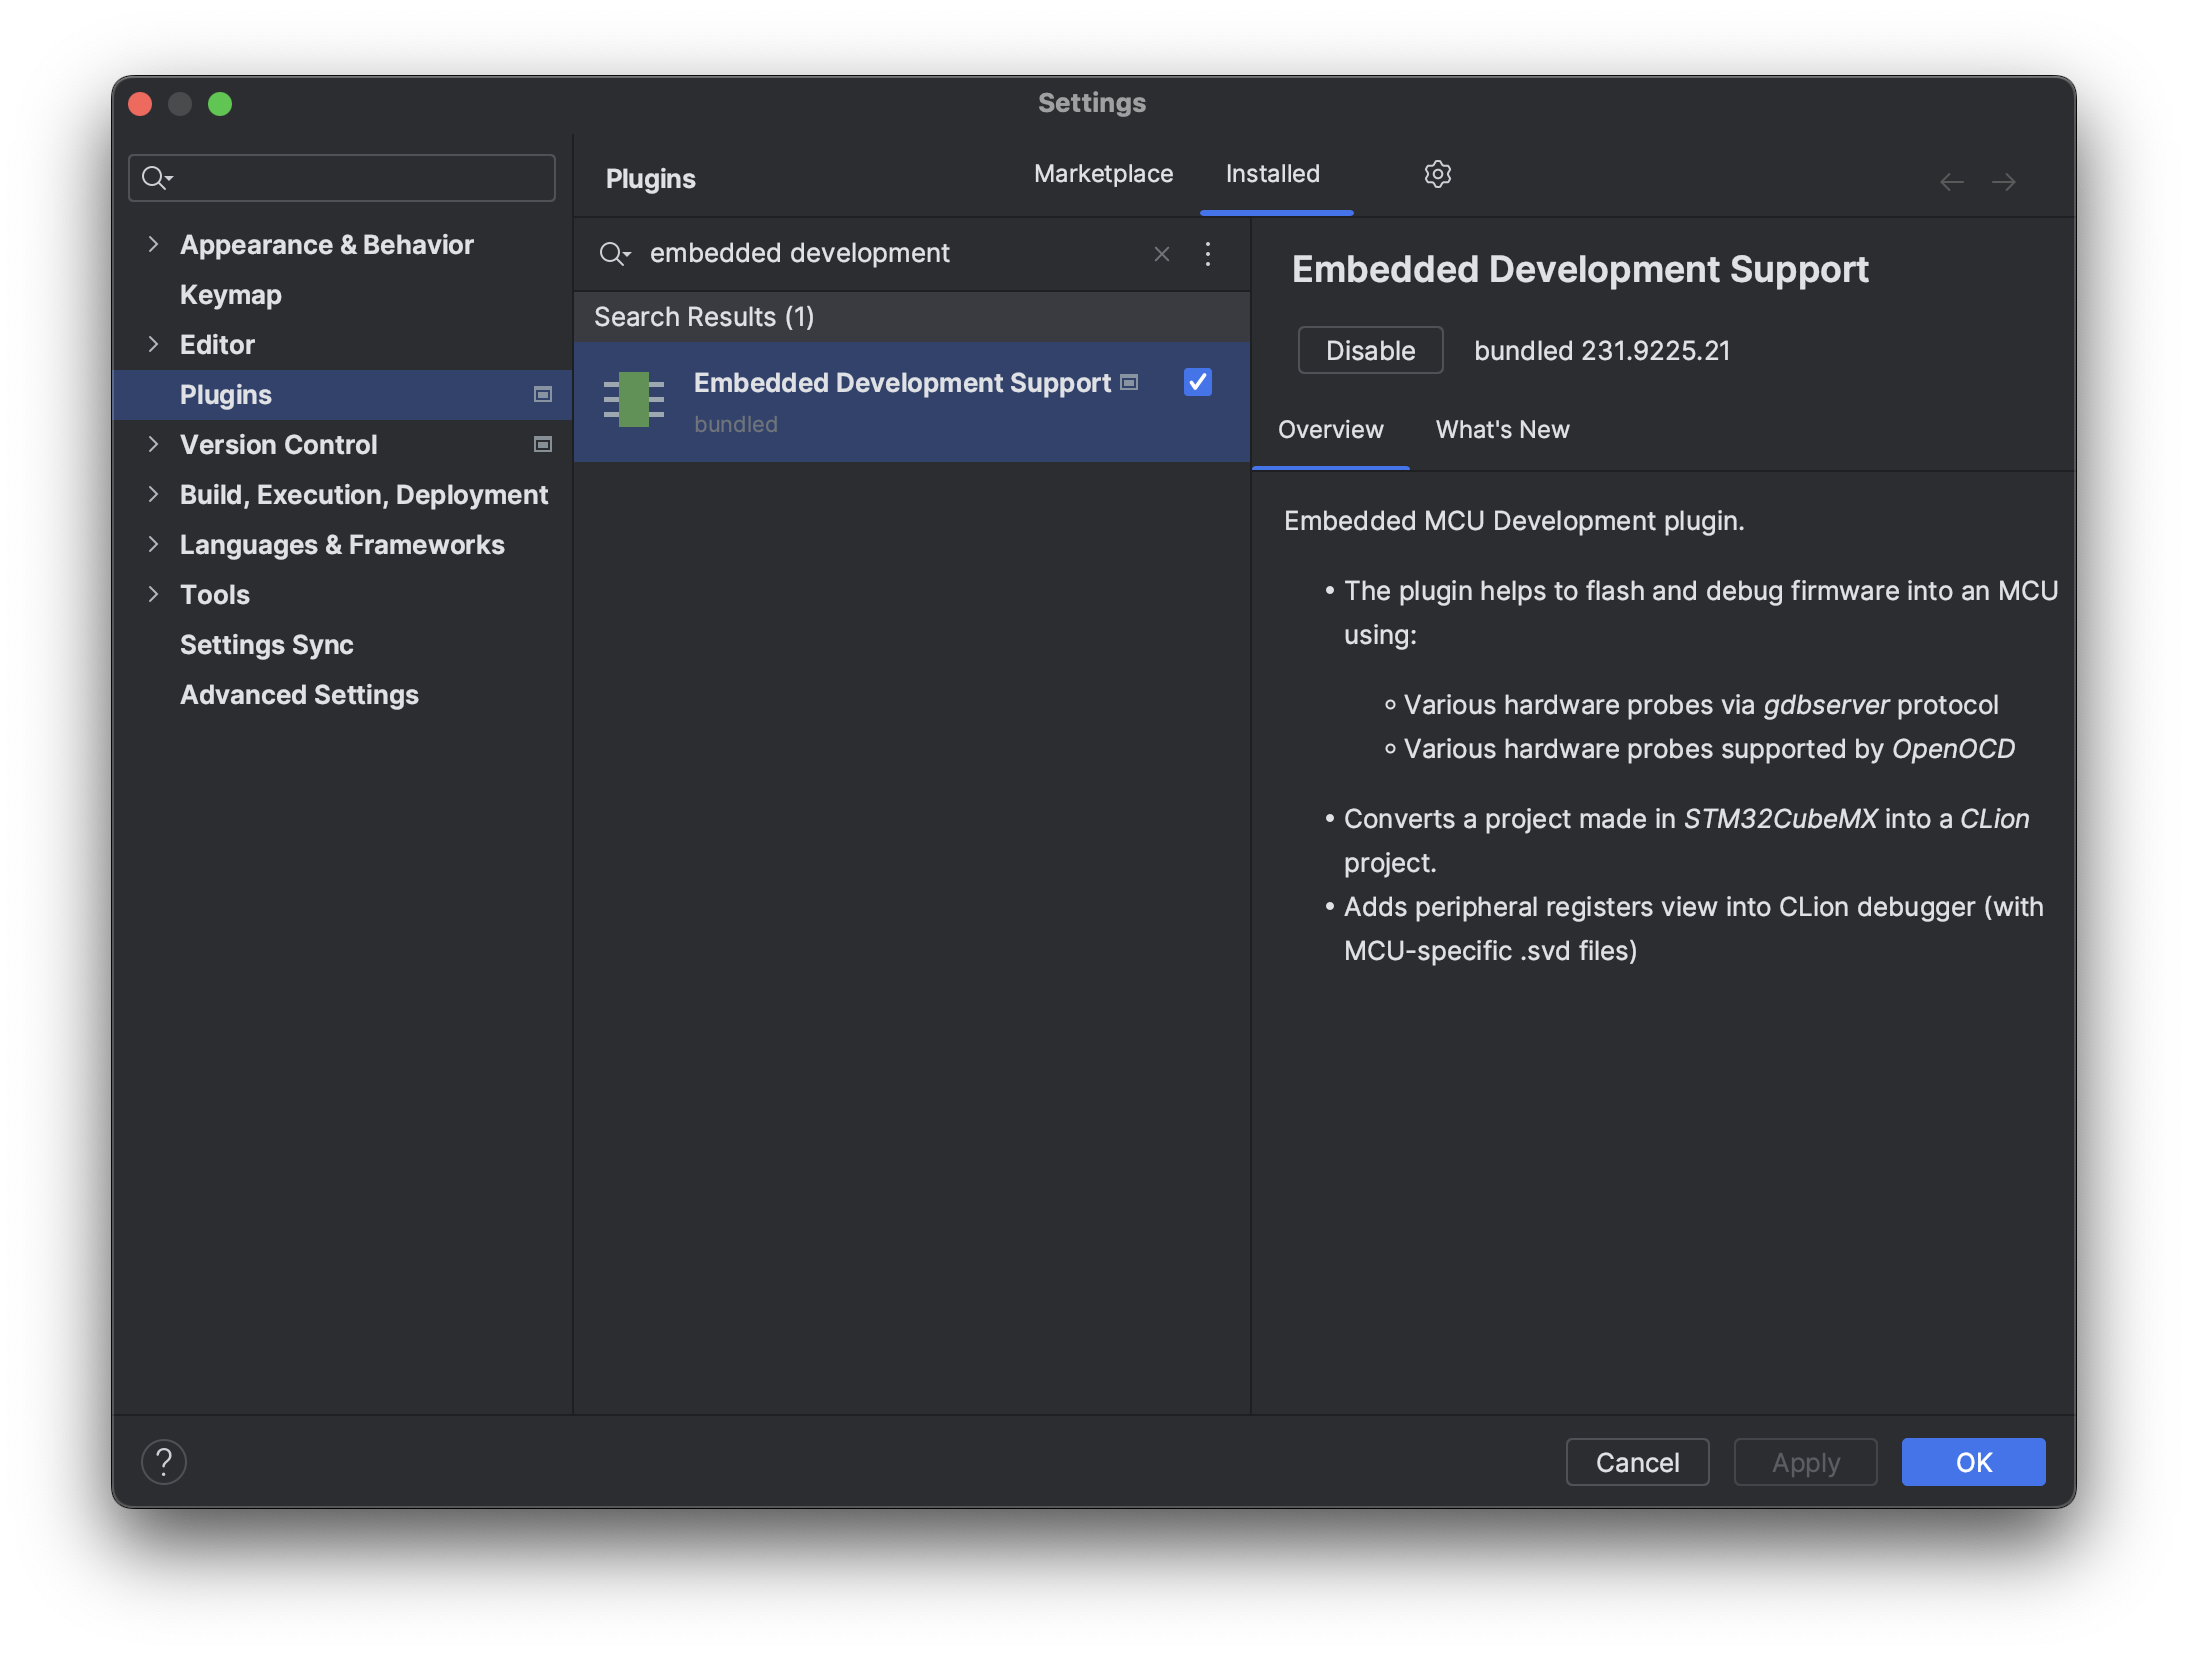
2.1 Enable Embedded Development Support CLion Plugin
Add the Embedded Development Support plugin for CLion:
Settings → Plugins
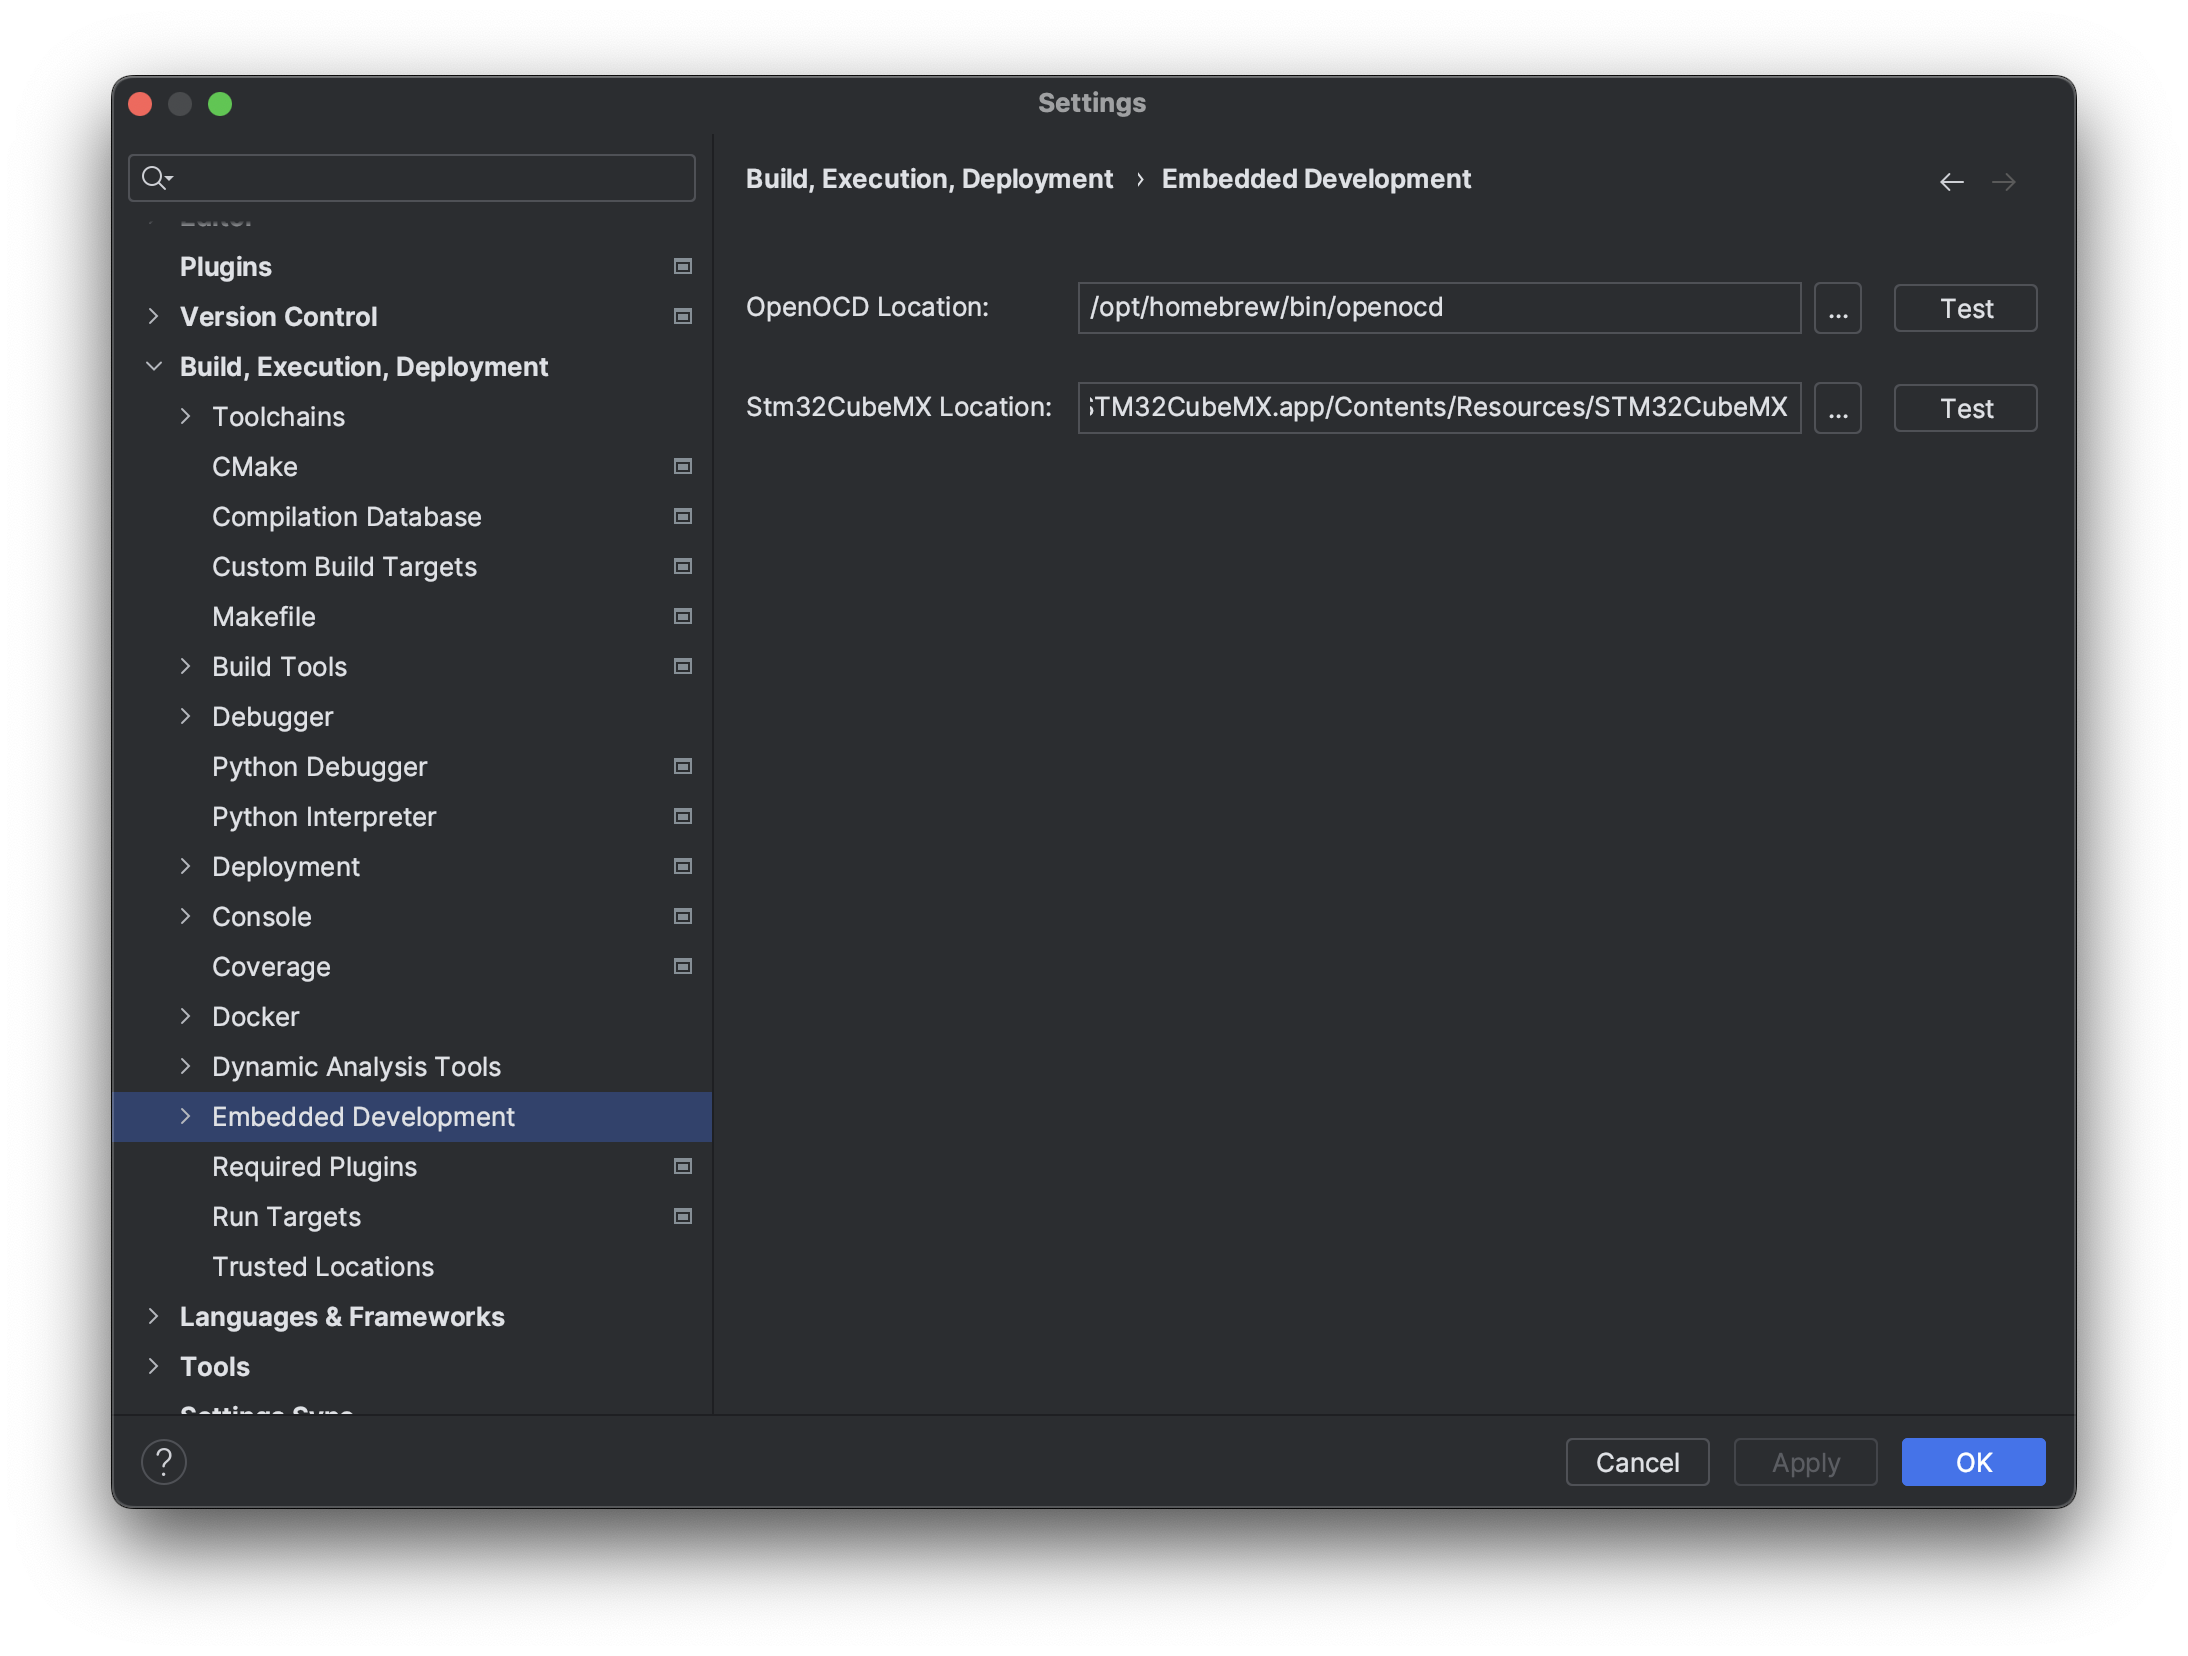
2.2 Setup OpenOCD and STM32CubeMX Paths
Add the path for OpenOCD and STM32CubeMX:
Settings → Build, Execution, Deployment → Embedded Development
-
You can always click the
Testbutton to see if the path is valid. -
For Windows the default paths are:
C:\Users\**NAME_HERE**\Documents\OpenOCD-20230712-0.12.0\bin\openocd.exe C:\Program Files\STMicroelectronics\STM32Cube\STM32CubeMX\STM32CubeMX.exe -
For macOS the default paths are:
/opt/homebrew/Cellar/open-ocd/0.12.0/bin/openocd
/Applications/STMicroelectronics/STM32CubeMX.app/Contents/Resources/STM32CubeMX
2.3 Setup Arm GNU Toolchain GCC and G++
Add the path for Arm GNU Toolchain (arm-none-eabi-gcc).
Settings → Build, Execution, Deployment → Toolchains

- For Windows the default paths are:
C:\Program Files (x86)\Arm GNU Toolchain arm-none-eabi\12.3 rel1\bin\arm-none-eabi-gcc.exe C:\Program Files (x86)\Arm GNU Toolchain arm-none-eabi\12.3 rel1\bin\arm-none-eabi-g++.exe - For macOS the default paths (for homebrew original GCC or ARM Developer
version) are:
/opt/homebrew/Cellar/ArmGNUToolchain/12.3.rel1/bin/arm-none-eabi-gcc /opt/homebrew/Cellar/ArmGNUToolchain/12.3.rel1/bin/arm-none-eabi-g++ ... or ... /Applications/ArmGNUToolchain/12.3.rel1/arm-none-eabi/bin/arm-none-eabi-gcc /Applications/ArmGNUToolchain/12.3.rel1/arm-none-eabi/bin/arm-none-eabi-g++- Note that for macOS you may see a warning
stating
Your CMake run finished with errors more....- Ignore this error for now, (future TODO).
- Note that for macOS you may see a warning
stating
2.4 Create new CLion STM32CubeMX project
File → New → Project → STM32CubeMX

- Use the appropriate path if you are opening or creating a version controlled project.
2.4.1 Configure Version Control
Wait for STM32CubeMX to finish generating a default project.
If you are using version control, verify that any required files such as .git
are still in the project directory, sometimes STM32CubeMX may delete / overwrite
these files.
2.4.2 Remove Default Generated File Structure
Delete all files in your project except those that you specifically know are needed.
If you are new to the STM32 workflow follow the recommendations below:
- Keep
CMakeLists.txt,CMakeLists_template.txt,**PROJECT_NAME_HERE**.ioc. - Keep files required for version control such as
.git. - Keep
.idea(JetBrain's project structure file).
2.5 Configure STM32 with STM32CubeMX
If STM32CubeMX fails to open automatically you can find the newly
created **PROJECT_NAME_HERE**.ioc on the left-hand Project file structure
viewer.
- You can edit the
.iocat any later time, but you should at least select your target ST chip or board. - By default, the target chip will be selected to
STM32F030F4Px.
2.5.1 Configure STM32CubeMX Project Manager
Configure the Project Manager.
Project Name= will be the name of your.ioc.- The recommended name is to follow the name of the (project) directory
your
.iocis in.
- The recommended name is to follow the name of the (project) directory
your
Project Location= will be the root directory of your project.Toolchain / IDE=STM32CubeIDE.Generate Under Root=True.
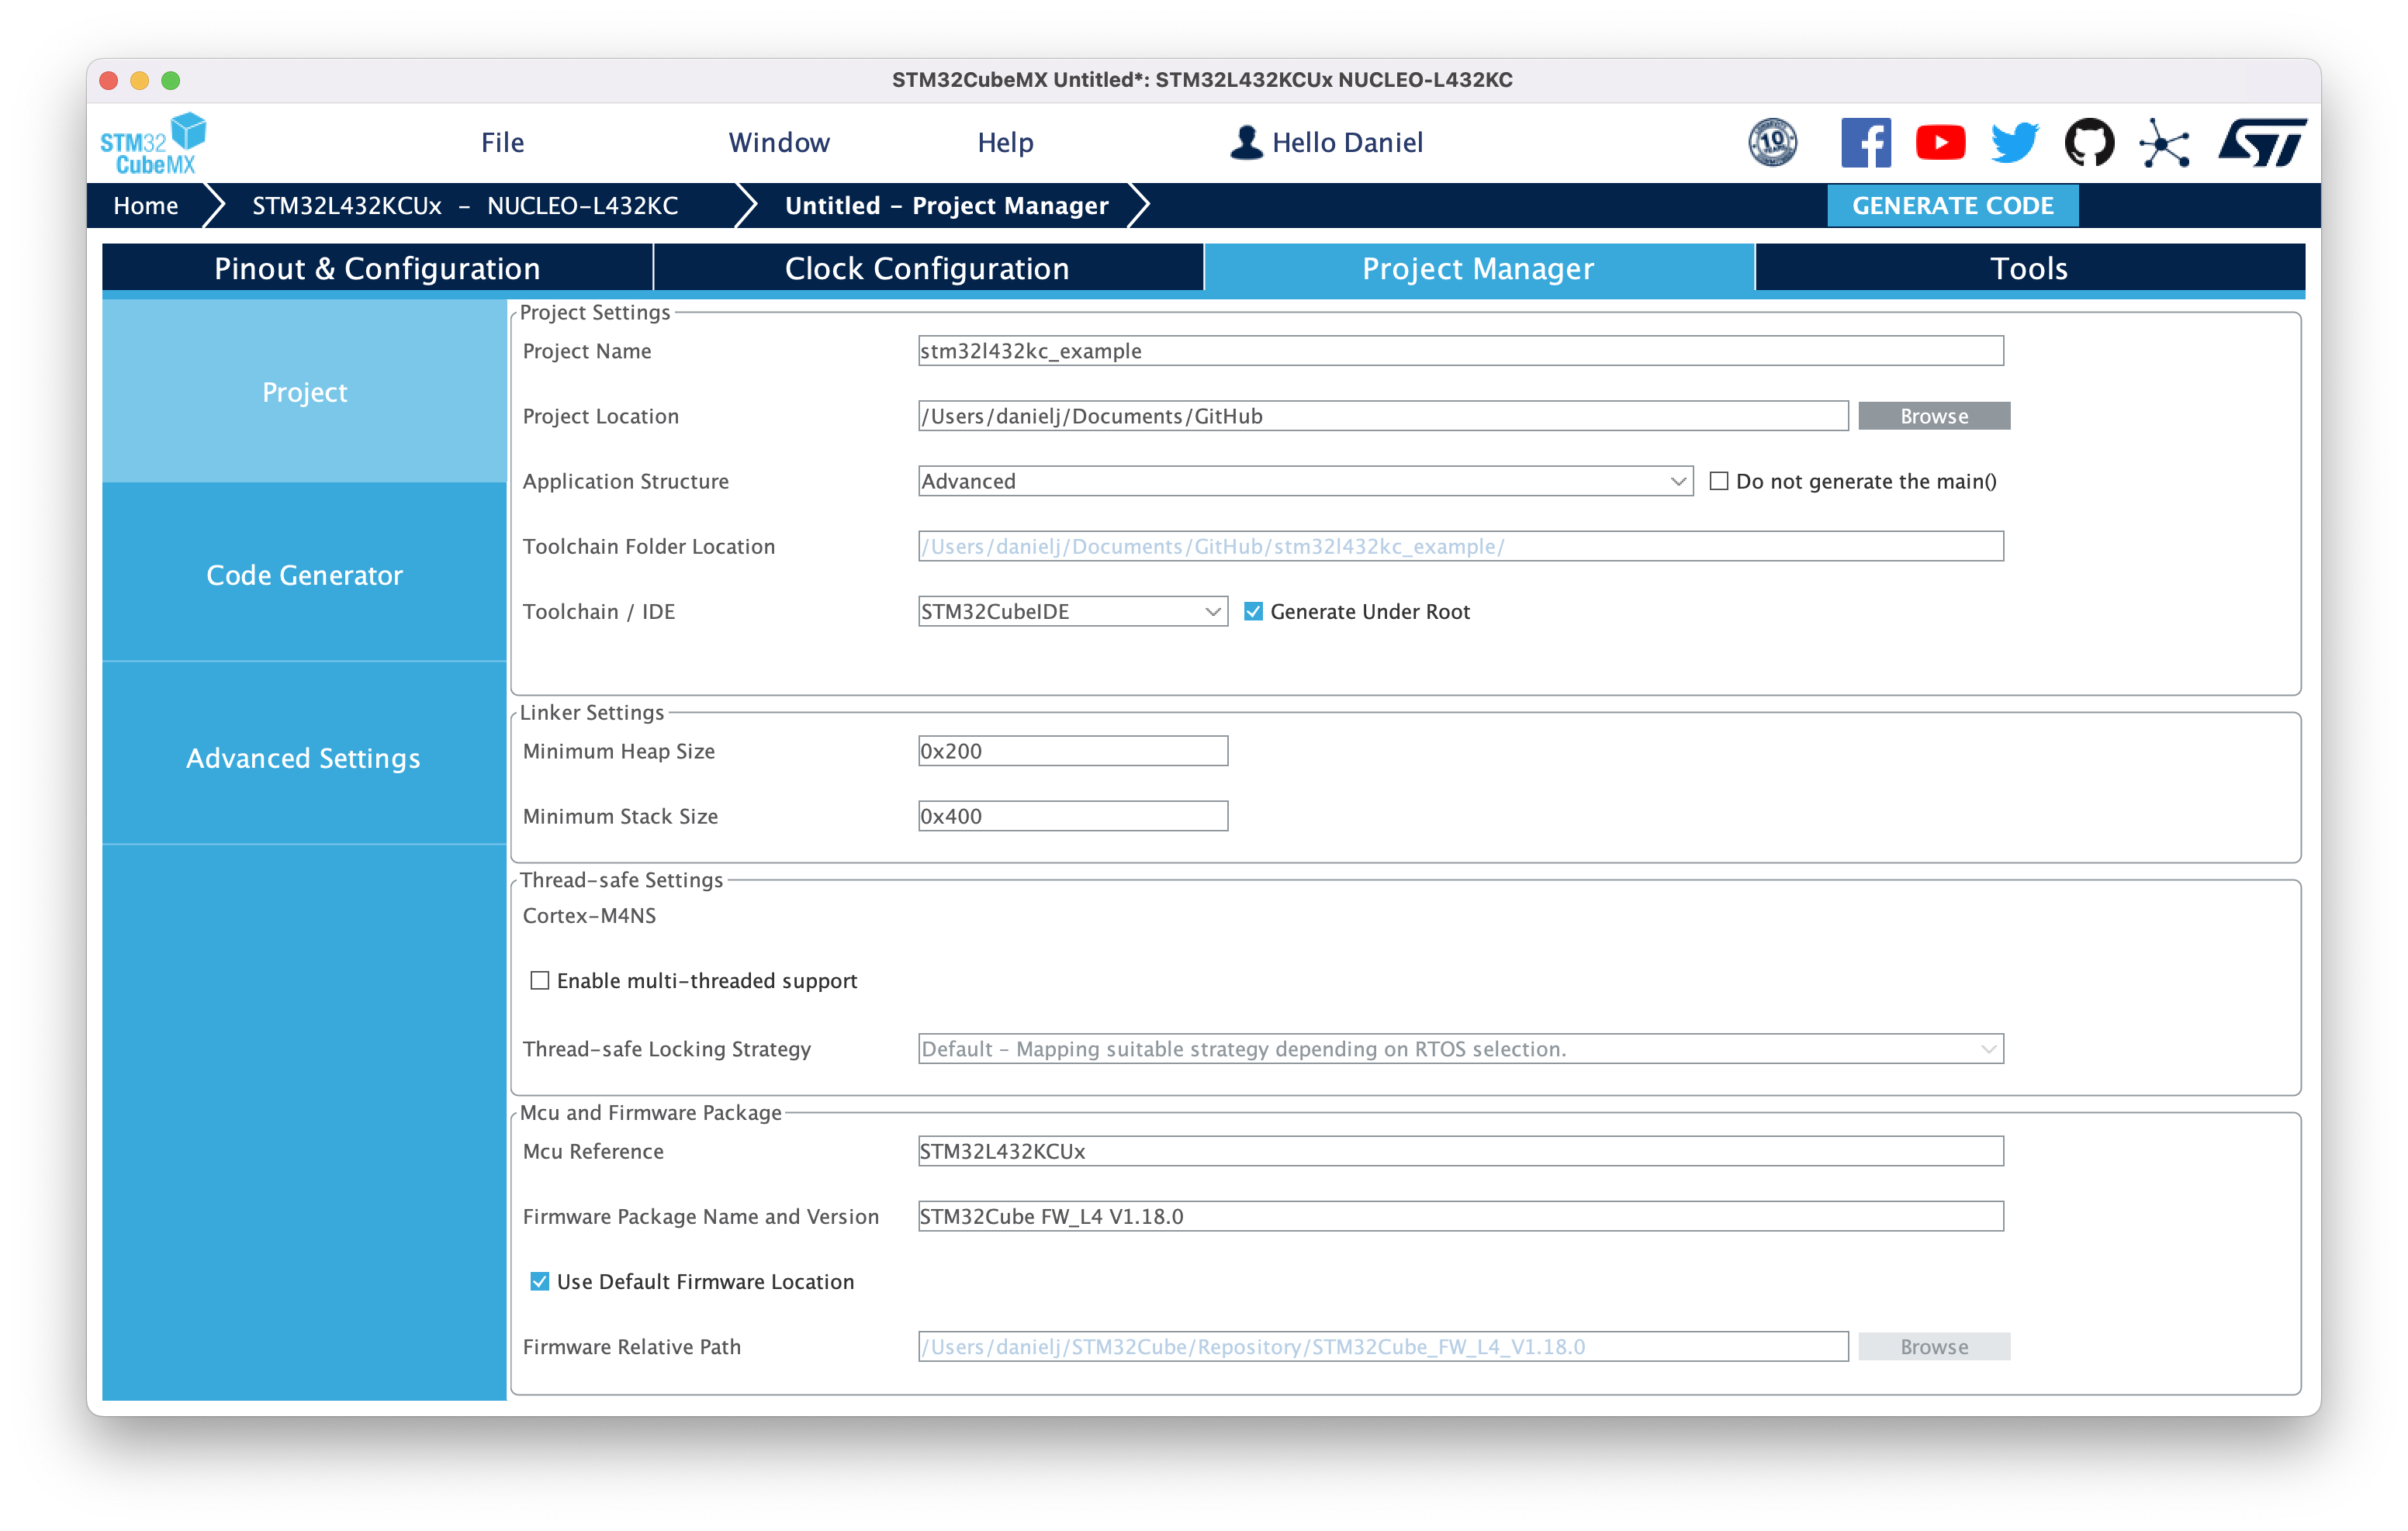
- Verify that your paths are correct, notice here my
Project Locationis in theGitHubdirectory, not the repo directory.- My
Toolchain Folder Locationis the path of my repository since theProject Namematches the repo name.
- My
2.5.2 Generate Code
Generate code with the... GENERATE CODE button.
- You may get a warning about overwriting the previous
.ioc, allow and continue.
2.6 Configure OpenOCD
2.6.1 Pick Target Board Configuration File
Set the OpenOCD board file via Select Board Configuration File popup.
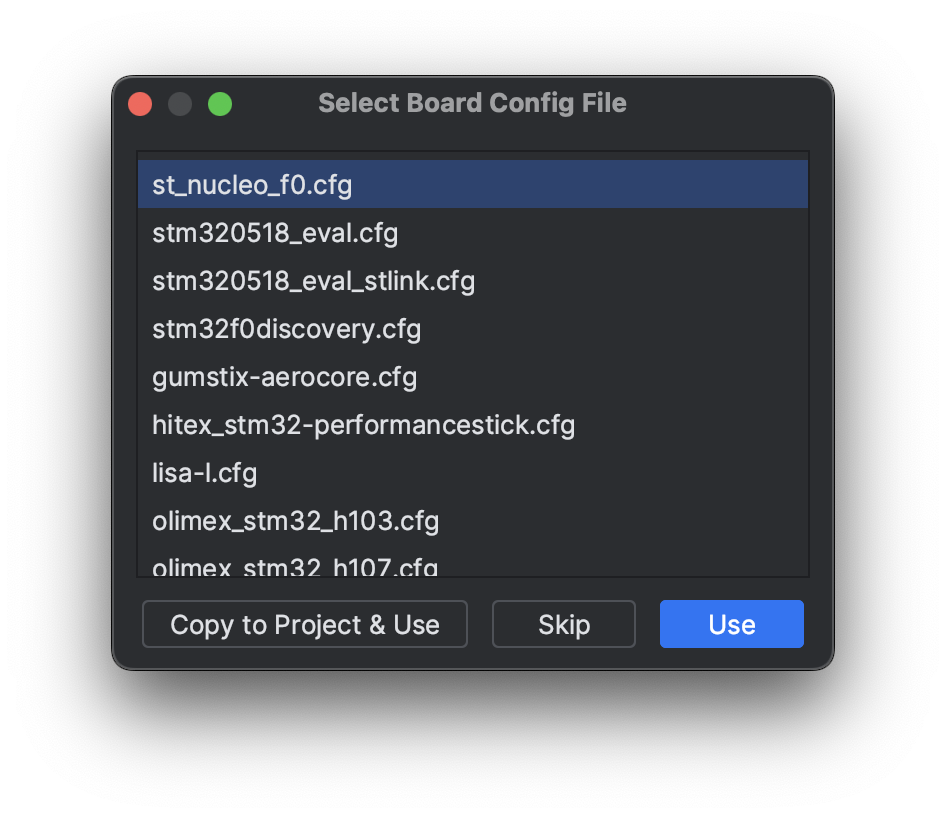
- Select the chip or board you are targeting, the default should be correct.
- Upon returning to CLion this popup should open automatically, if not we can select the board file in the following steps manually.
2.6.2 Configure Run and Debug
Run / Debug Configurations → Edit Configurations...
-
Top right drop down.
-
By default, CLion should configure the OpenOCD configuration, the dropdown will be called
OCD **PROJECT_NAME_HERE**. -
If this does not happen the dropdown will be labeled
Add Configuration... -
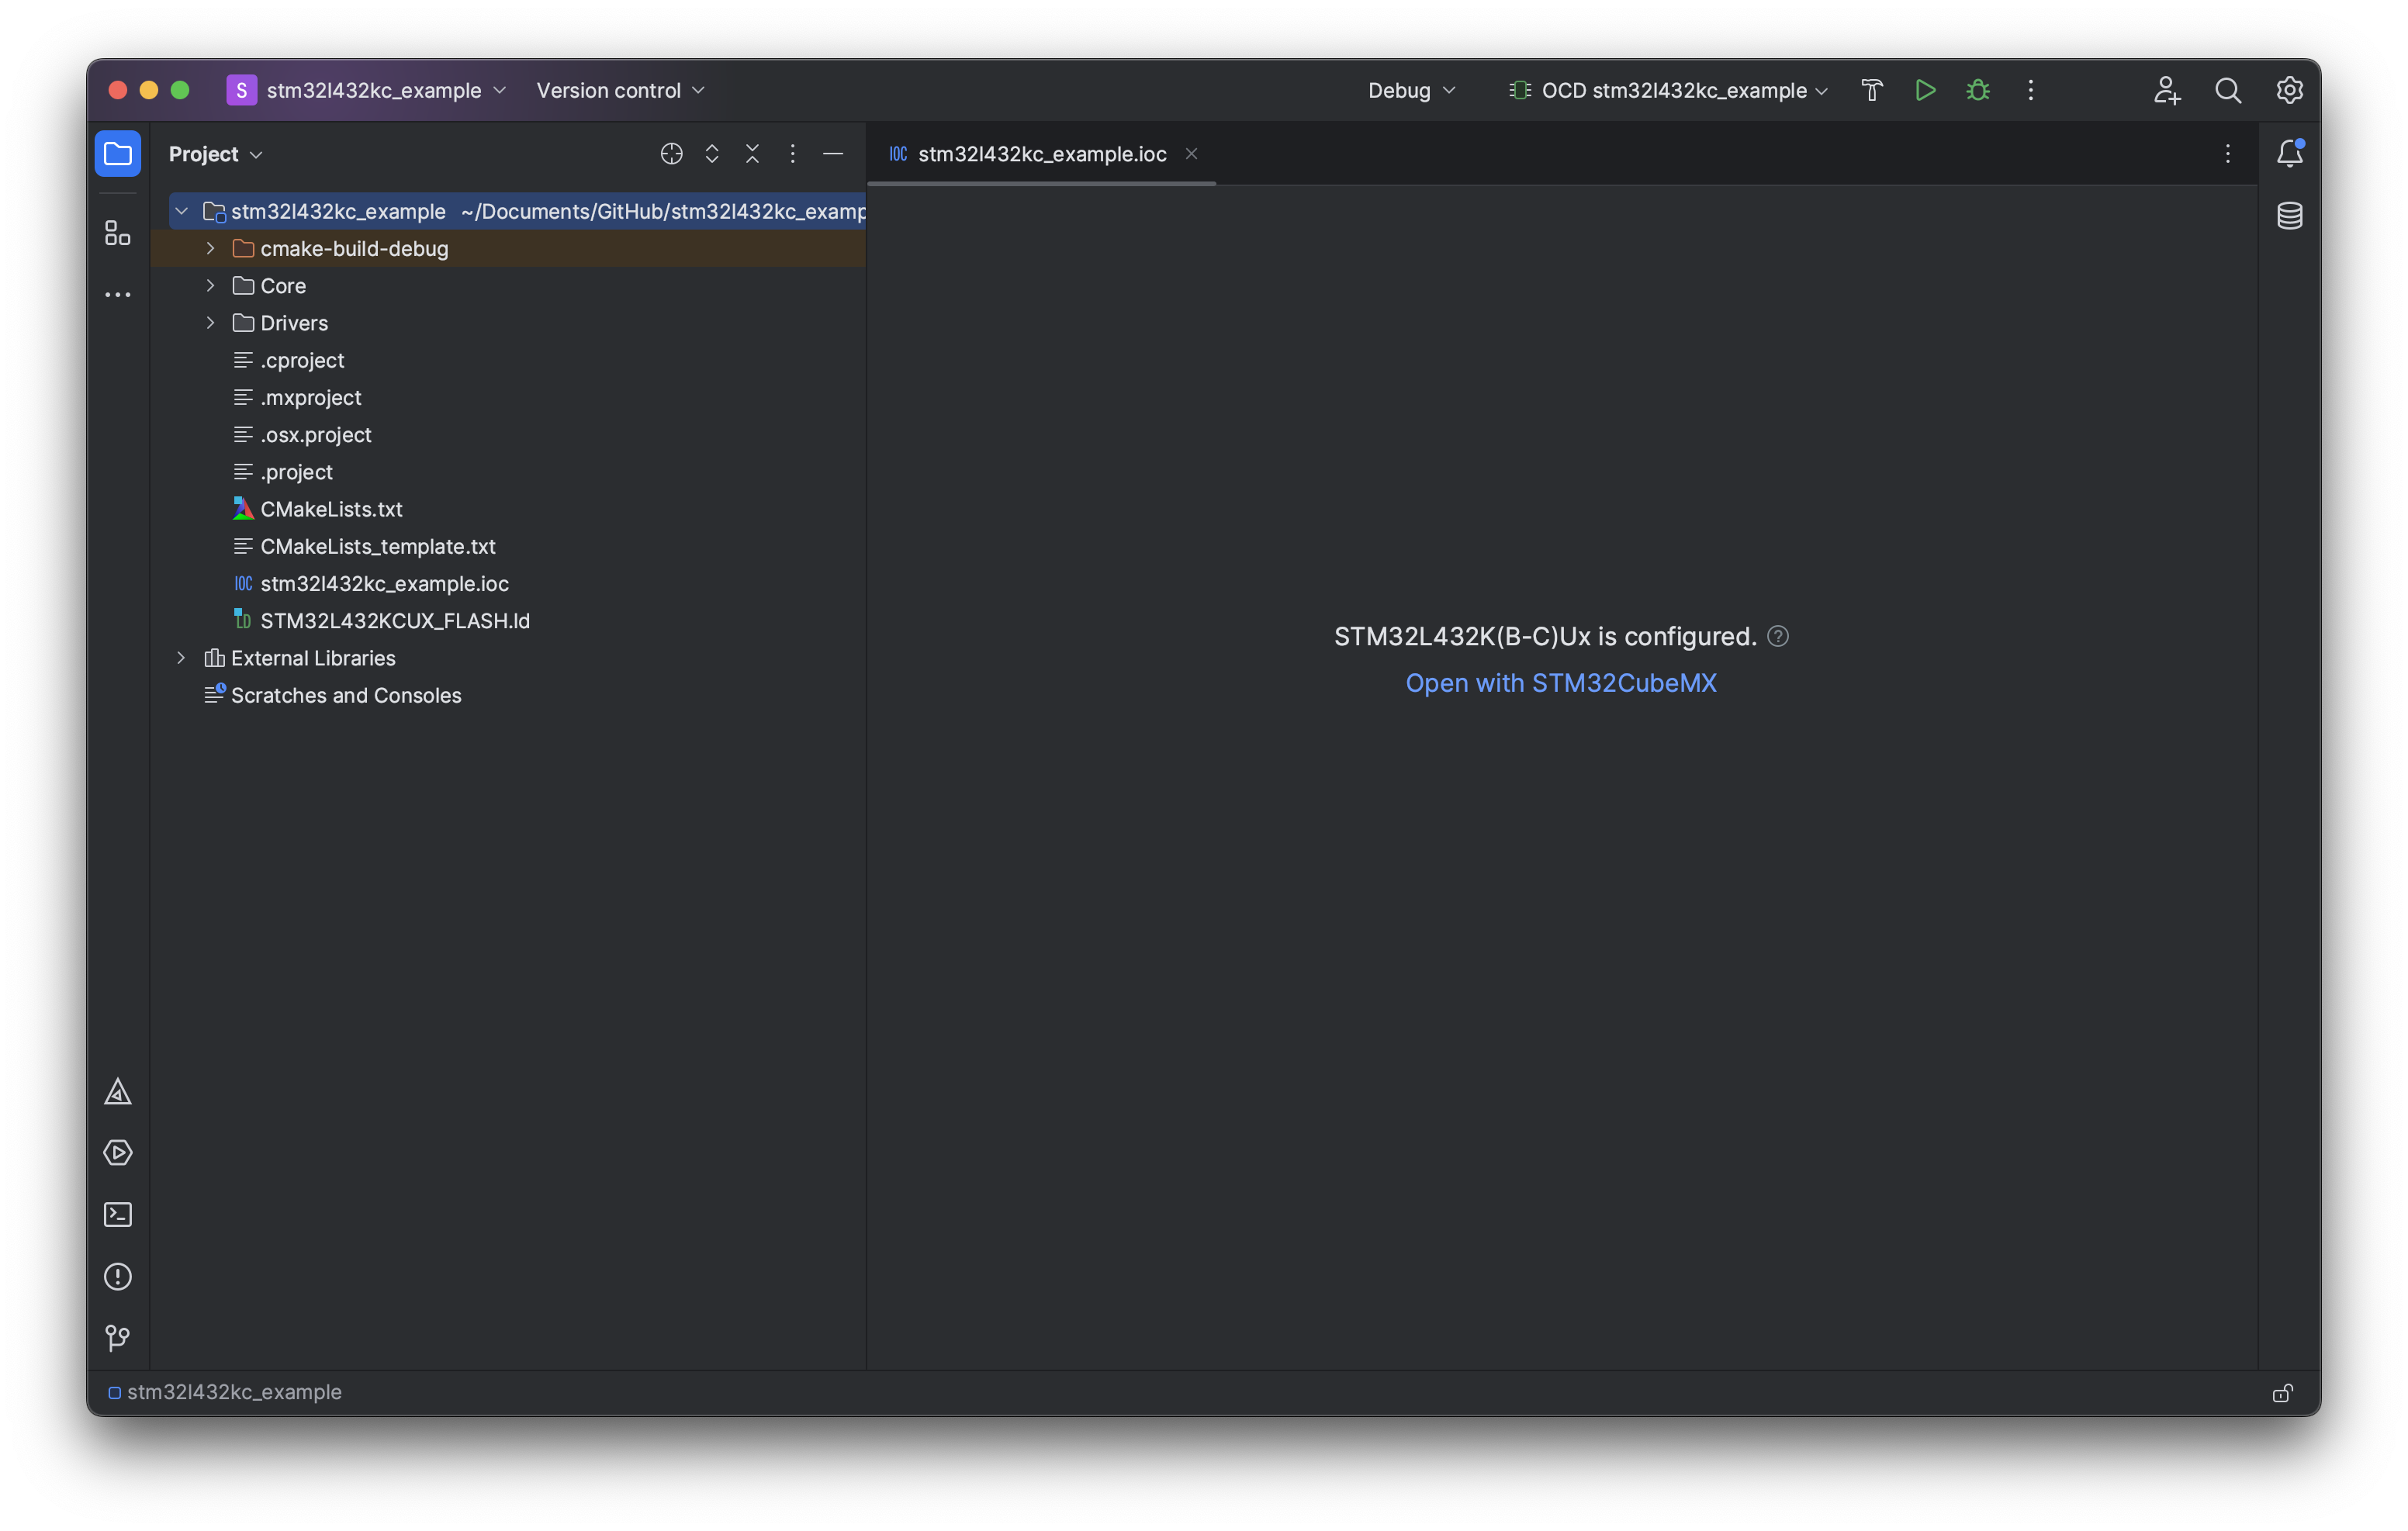
Your file structure should look identical to the picture above except for any project / ST chip names.
2.6.3 Verify Run and Debug Config
Run / Debug Configurations → Edit Configurations...
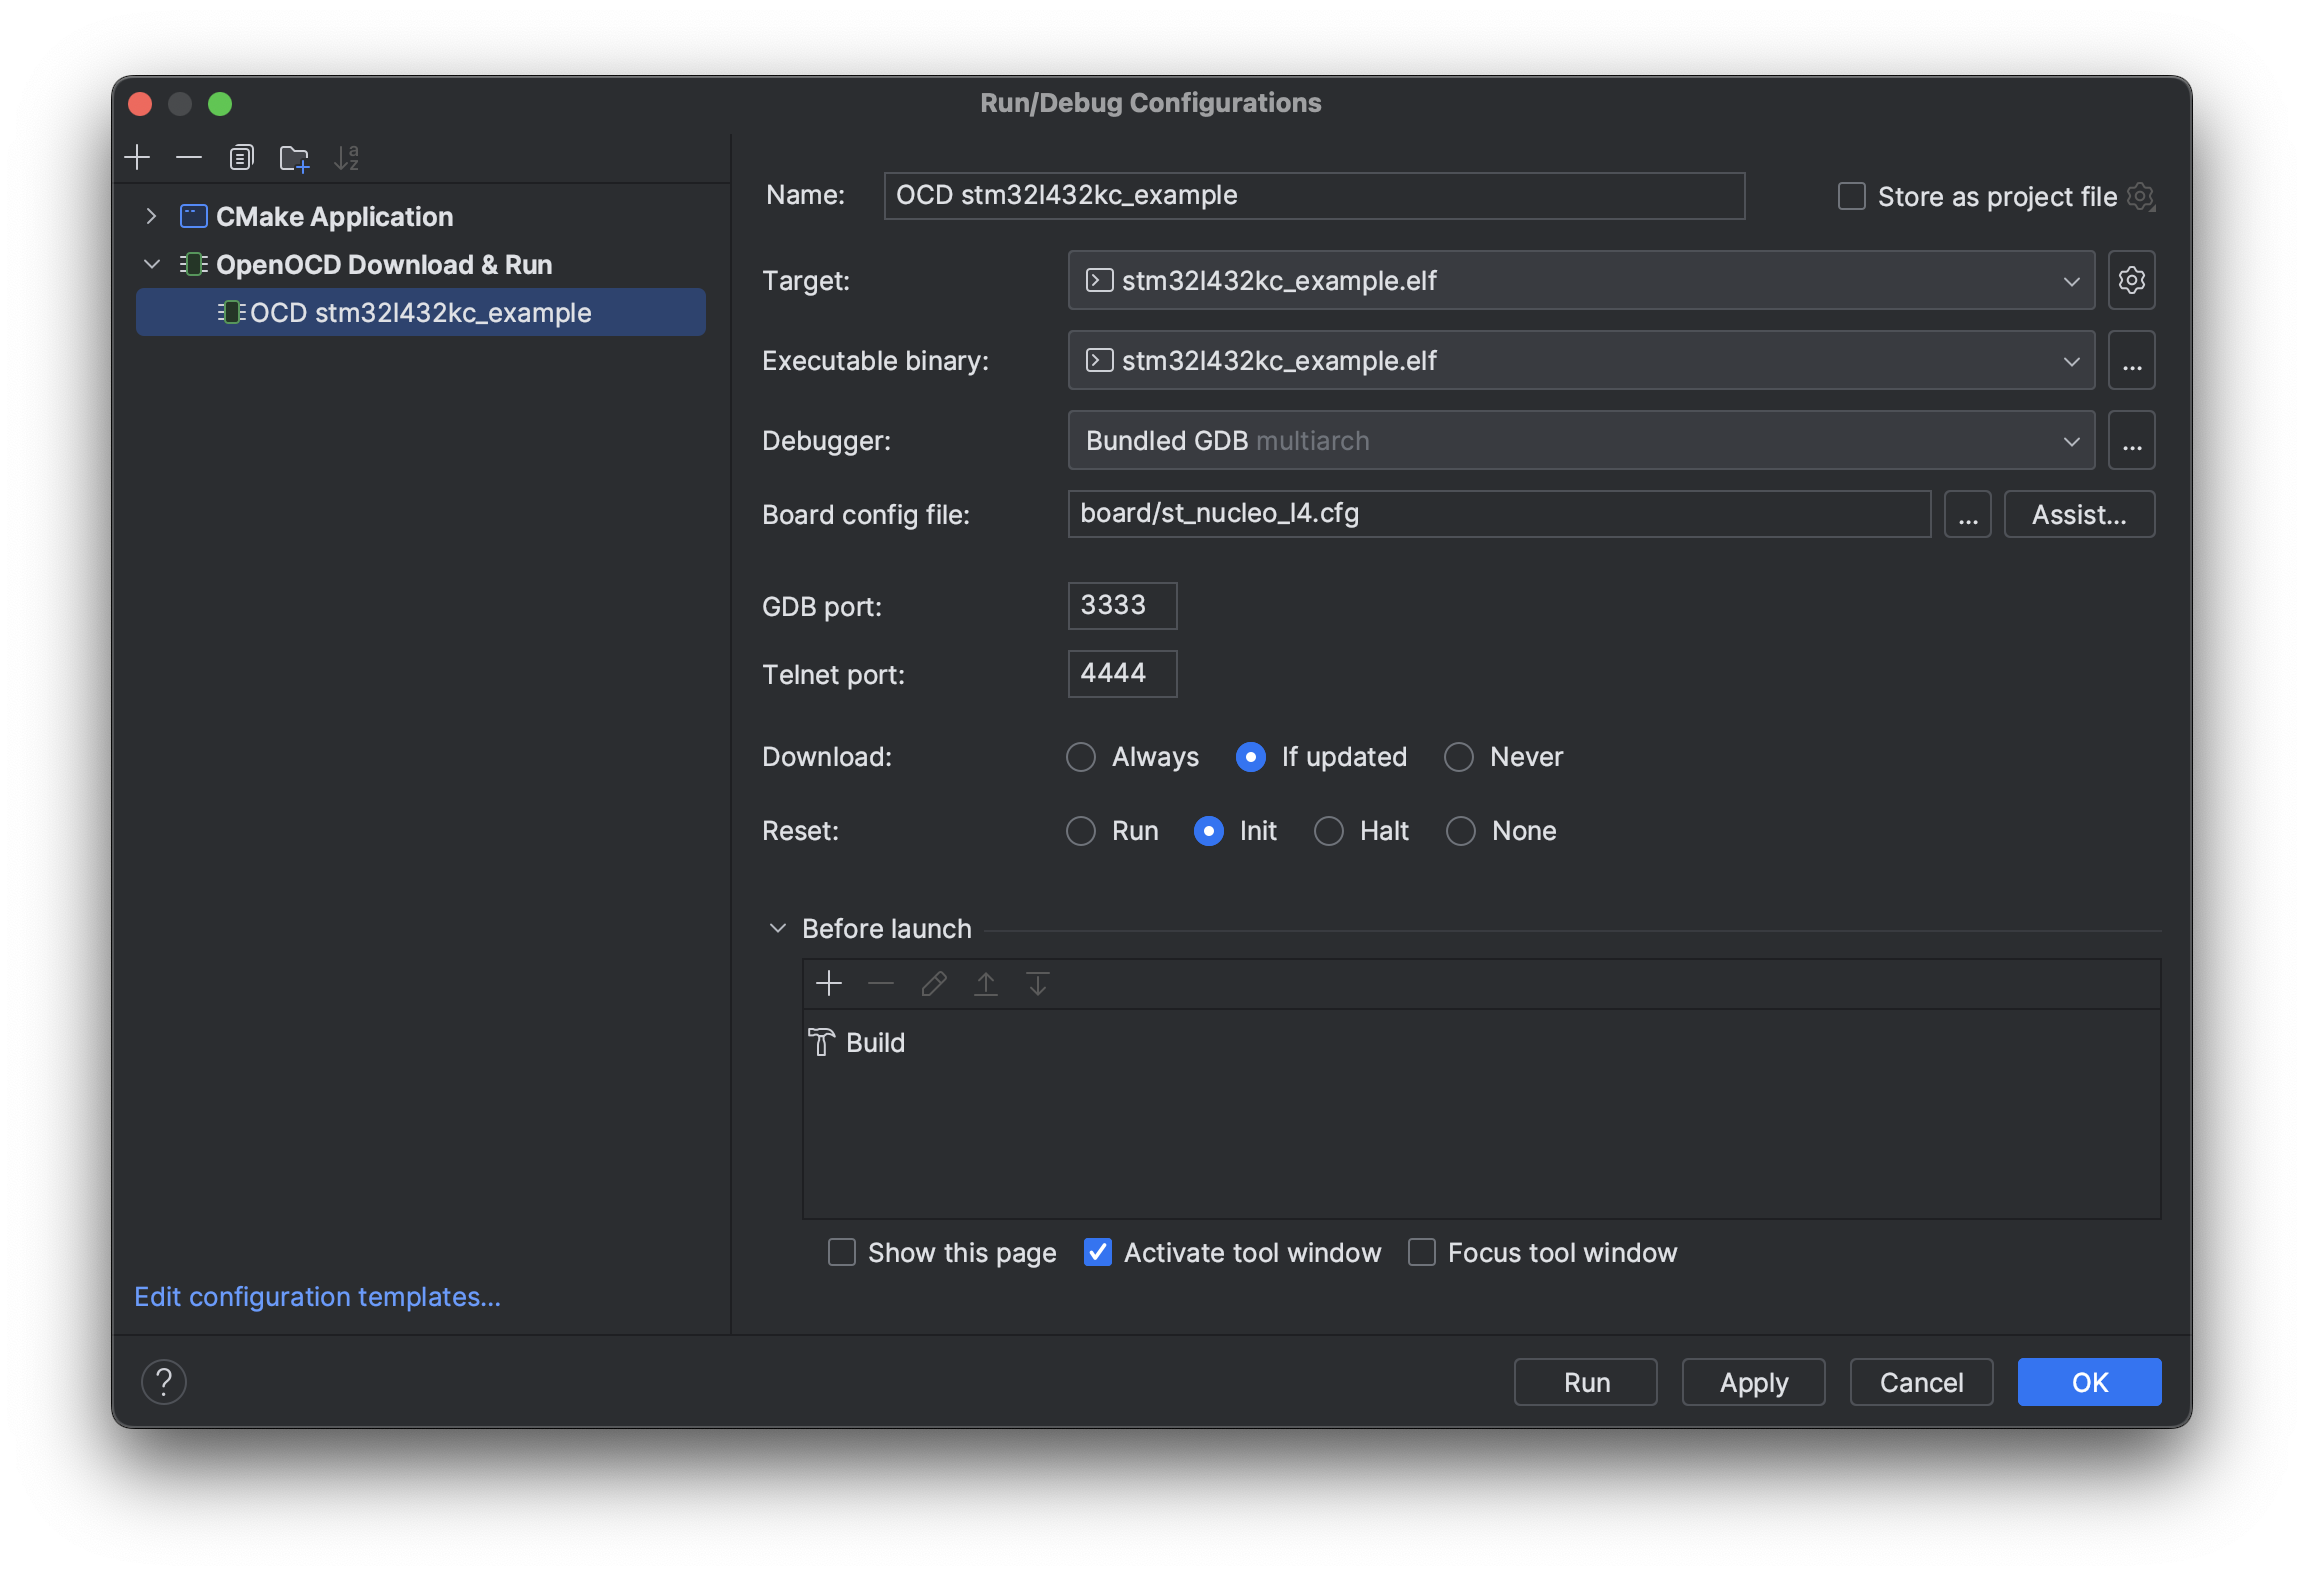
-
If the OpenOCD configuration was not generated automatically, click the
+button in the top left andOpenOCD Download & Run, then fill in the missing details shown below. -
Target=**PROJECT_NAME_HERE**.elf. -
Executable binary=**PROJECT_NAME_HERE**.elf. -
Debugger=Bundled GDB. -
Board config file=**ST_TARGET_HERE_BOARD_FILE**.cfg.- If you did not select a OpenOCD board file previously you can select one
manually now.
- Click
Assist...and a popup with all board files should show up, select your target chip or board.
- Click
- If you did not select a OpenOCD board file previously you can select one
manually now.
-
You can also set the download and reset behaviour here.
2.7 Hello World
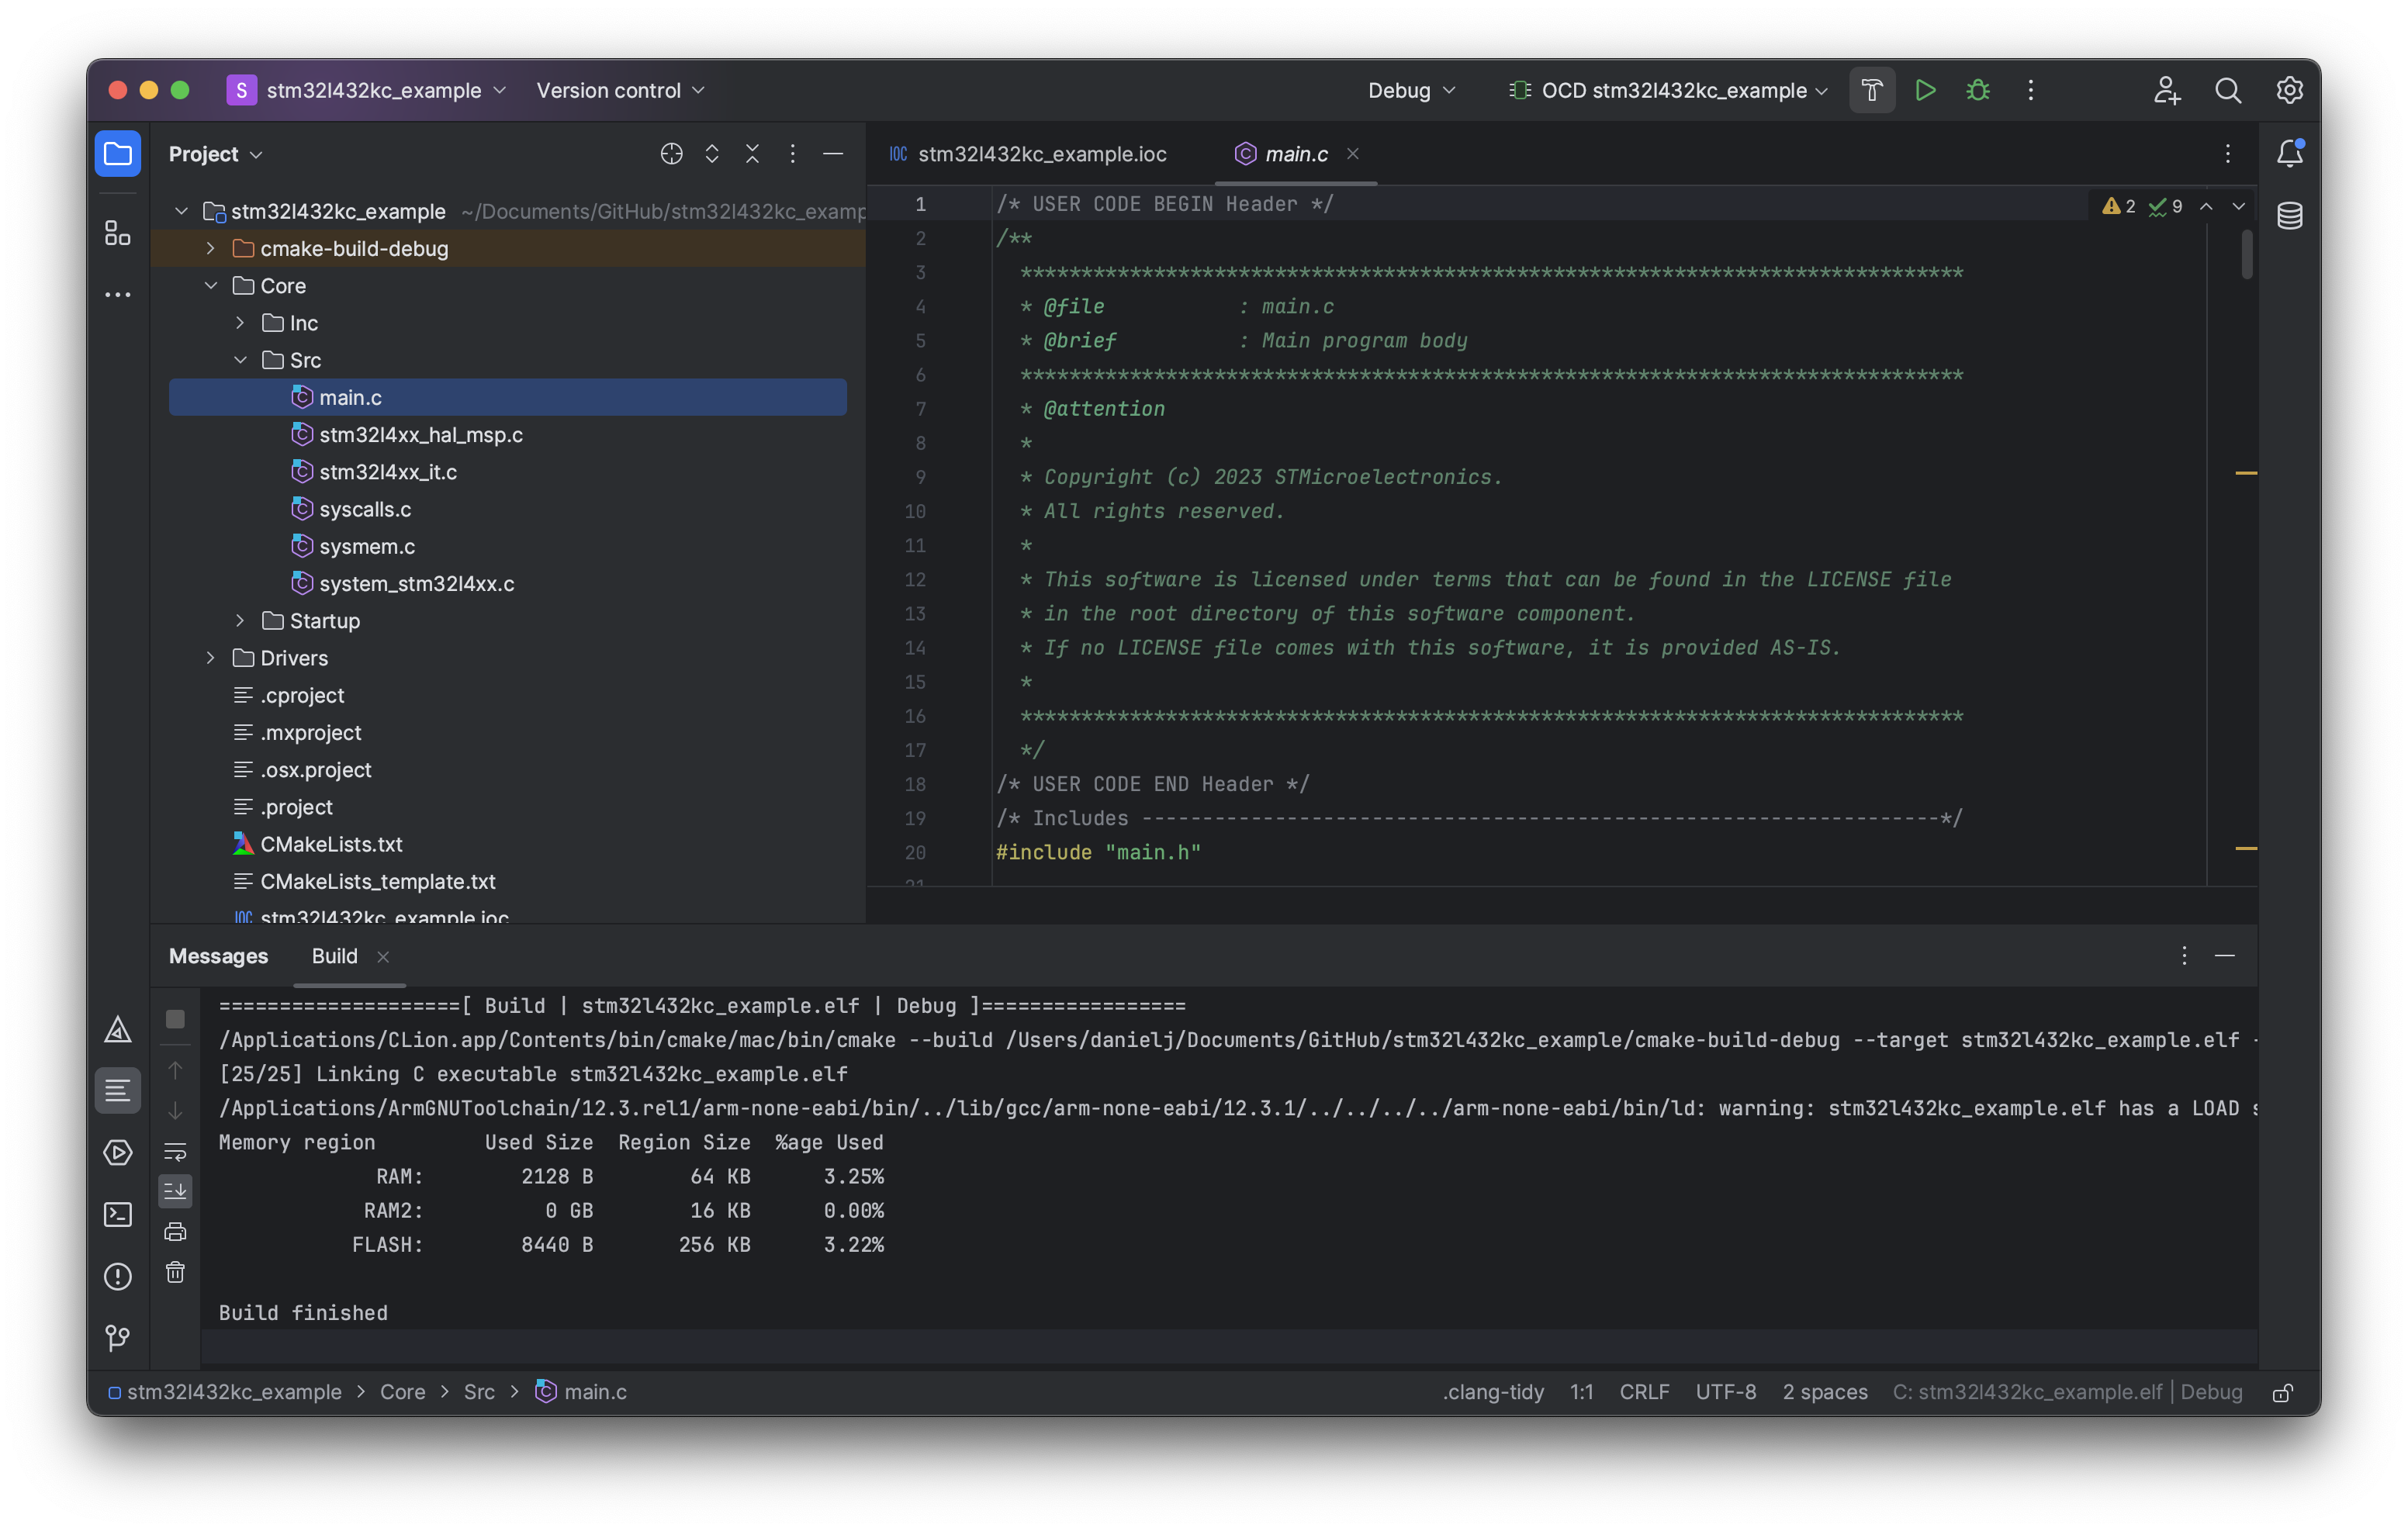
Use the project file structure view on the left-hand to see the source code.
Build, Run (flash ST) and Debug are shown in the top mid-to-right.